Sleepout® Curtain Rod Instructions
How to Install the Sleepout® Curtain Rod
Curtain Rod Installation Instructions
1. Assemble the Curtain Rod
-
Start by threading the curtain rod pieces together.
-
They should connect smoothly. If they don’t, they may not be properly aligned—double-check and realign as needed.
-
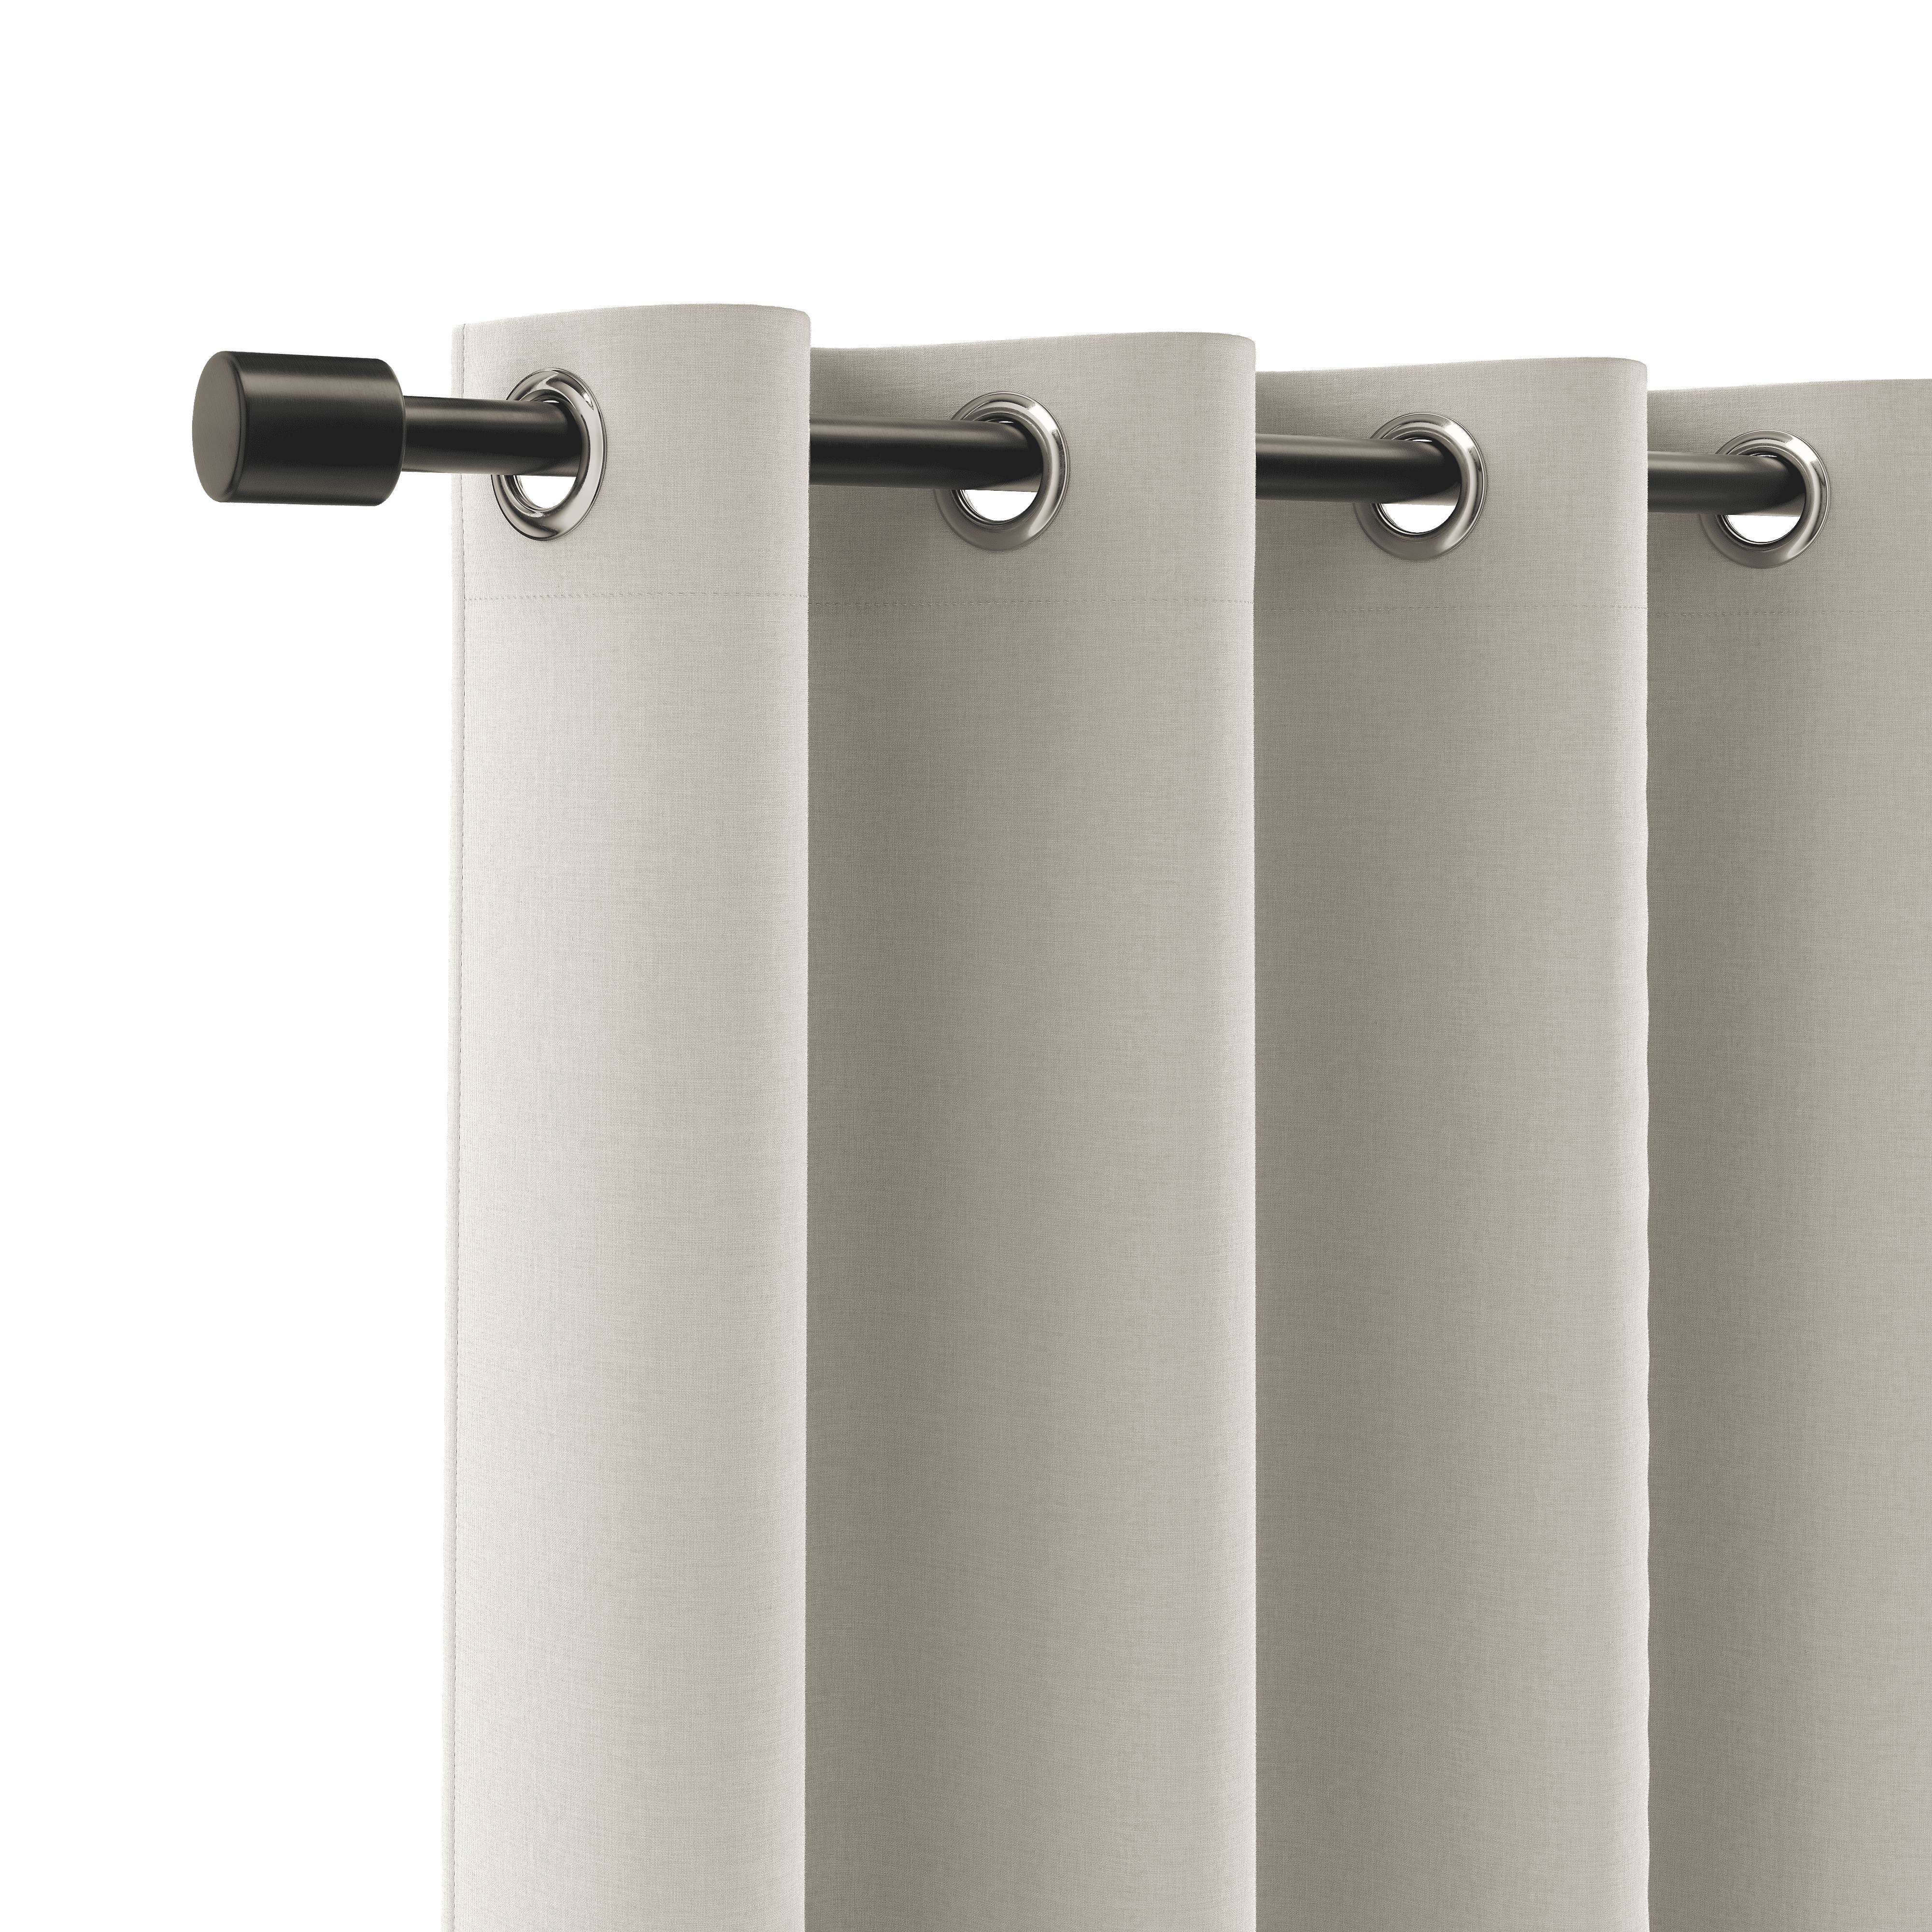
Make sure the pieces on each end of the rod are the ones with the head mounts (these have small holes near the ends).

2. Determine the Rod Length
-
Hold the assembled rod up to your window to decide on the ideal width.
-
We recommend going as wide and as high as possible for the best look and coverage.
3. Position the Curtains
-
Slide your curtains onto the rod.
-
Hold the rod with curtains up to the window to visualize where the brackets should go.
4. Mark Bracket Placement
-
Once you’ve chosen a general height and width, mark one bracket hole on the wall with a pencil.
-
You can either screw directly into the wall or drill a pilot hole first, about the size of the screw.
5. Center the Rod
-
Measure from the first bracket hole to the center of the window and note the length.
-
Use this same length from the center to the opposite side to mark the second bracket hole, ensuring the rod will be centered.

6. Ensure the Brackets Are Level
-
Check that both bracket holes are level using a level tool or by eye.
-
If needed, adjust one of the marks to match the other.
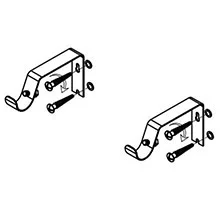
7. Install the Brackets
-
Disassemble the brackets (this makes them easier to screw in).
-
Screw the brackets into the marked spots.
-
Once the top screw is in and level on both sides, drill and install the lower screw for each bracket.
8. Final Bracket Adjustments
-
Reassemble the brackets on the wall.
-
Adjust the bracket's distance from the wall as needed.
-
Unscrew the thumbscrew (the small screw on the side) by hand to prepare for inserting the rod.
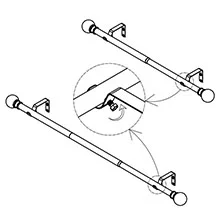
9. Hang the Curtains
-
With the thumbscrews loosened, place the curtain rod into the brackets.
-
If it’s hard to reach, lift one side at a time and rest the other end gently on the floor.
10. Secure the Rod
-
Once the rod is in place, tighten the thumbscrews by hand to secure the rod.