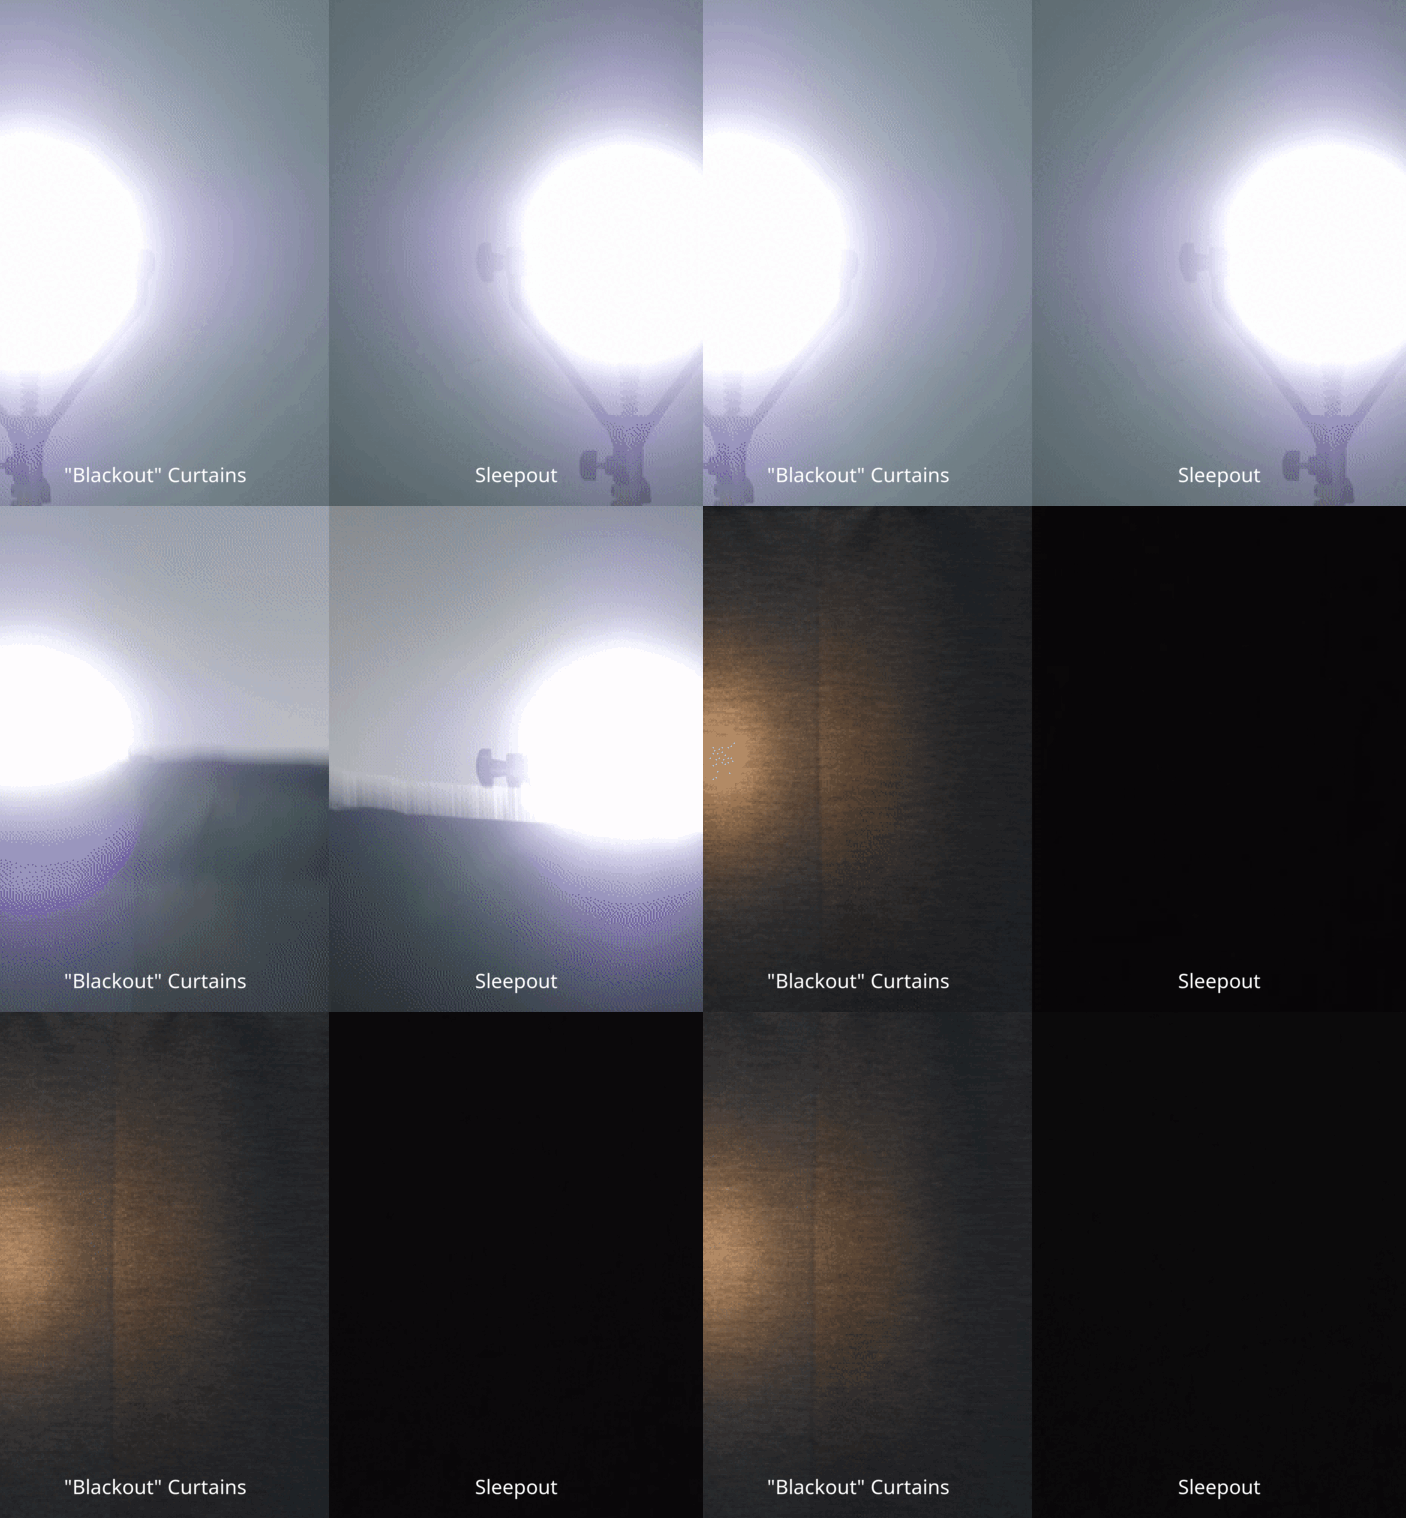
Does the sun sneaking into your room disturb your peaceful sleep or disrupt your child's nap time? Fear not! With the right tools and some quick tips, you'll be able to install blackout curtain fasteners efficiently and enjoy a pitch-dark room in no time. This guide will walk you through the detailed steps of installing blackout curtain fasteners, giving you the promise of undisturbed sleep and a room equipped to block out every ray of light.
First off, let's discuss why blackout curtains are a game-changer. These curtains are designed to keep out all forms of light, from the harsh midday sun to the gentle glow of streetlights at night. Alongside improving sleep quality, they aid in maintaining room temperature, thus enhancing the overall comfort of your living space. Now, let's delve into the nitty-gritty of installing blackout curtain fasteners to bring these benefits to your home.

Step 1: Gather Your Tools
Before you begin, gather all the necessary materials. You will need a power drill, screws, a measuring tape, a level, and, of course, blackout curtain fasteners. Don’t forget your blackout curtains from Sleepout, whether it’s our Sleepout Portable Blackout Curtain or our standard Sleepout Home Blackout Curtains.
Step 2: Measure Your Windows
Use a measuring tape to get precise measurements of your window's length and width. Accuracy is crucial as it ensures the proper fitting of your blackout curtain fasteners and curtains. Mark these measurements to guide you during the installation process.

Step 3: Choose the Type of Fastener
Blackout curtain fasteners come in various types such as hook-and-loop tapes, suction cups, and adhesive strips. For a semi-permanent solution, consider using Sleepout Adhesive Strips. The right choice depends on your needs and the type of window surface you're working with.
Step 4: Mark the Installation Points
Hold the fasteners up against the window frame and mark the points where you will drill or apply adhesive. Use a level to ensure that your markings are straight. This will ensure that the curtains hang evenly and block light effectively.

Step 5: Install the Fasteners
If you’re using screws, drill small pilot holes at your marked points to make the installation easier. Then, attach the fasteners using screws or adhesive as per your selected type. Double-check that they are secured tightly to support the weight of the curtains.
Step 6: Attach the Curtains
Once your fasteners are securely installed, it’s time to hang your blackout curtains. Begin from one side and ensure that each part aligns correctly with the installed fasteners. Give the curtain a slight tug to confirm it is secured properly.
Step 7: Test the Setup
After securing the blackout curtains, close them fully and check for any light seepage. Walk around the room to identify if light is entering through any part of the curtain or window. If necessary, adjust the fasteners or curtains to block out any remaining light.

Step 8: Make Adjustments
If you notice any gaps allowing light to seep through, you may need to add extra fasteners or use additional adhesive strips. For small windows or unique setups, using Extra Sleepout Suction Cups can be particularly beneficial.
Advanced Tips
For larger windows or custom installations, consider using multiple layers of curtains with overlapping sections. This can significantly boost the energy efficiency and light-blocking capacity of your setup.
Regular Maintenance
Periodically check all fasteners for wear and tear. Replace any elements that seem loose or worn out to maintain the curtain's effectiveness over time.
Additional Benefits
Besides providing you a darkened room, these blackout solutions can also enhance your home’s aesthetics and contribute to better sound insulation. They are a perfect investment for anyone looking to improve their living space's coziness and efficiency.

Environmentally Friendly Options
At Sleepout, we believe in providing eco-friendly options. Our blackout curtains are designed to minimize energy consumption by keeping your home cooler in the summer and warmer in the winter. A small step can lead to significant energy savings and reduced carbon footprint.
Specific Situations
If you have an irregular window shape or an awkward installation space, custom blackout curtains might be your best bet. Contact Sleepout’s customer service for personalized advice and solutions.
Safety Measures
Always follow safety guidelines when using drills and other tools. Ensure to keep children away from the installation area to prevent any accidents.
Feedback and Community
Join our community of happy customers who have transformed their living spaces with Sleepout blackout curtains. Share your installation tips or seek advice from fellow users through our social media platforms.
Conclusion
By now, you should have a comprehensive understanding of how to install blackout curtain fasteners quickly and effectively. A well-darkened room can significantly improve your sleep quality and overall well-being. So go ahead, take control of your comfort, and enjoy the undisturbed rest you deserve.
Key Takeaways
In this article, we covered the importance of blackout curtains, walked through the materials needed, provided detailed step-by-step instructions, offered advanced tips, and highlighted the additional benefits of using blackout curtains. Whether for sleep improvement or energy efficiency, installing blackout curtains fasteners is a project that will yield high rewards. Get started today and experience the full benefits of a well-darkened room with Sleepout curtains.

