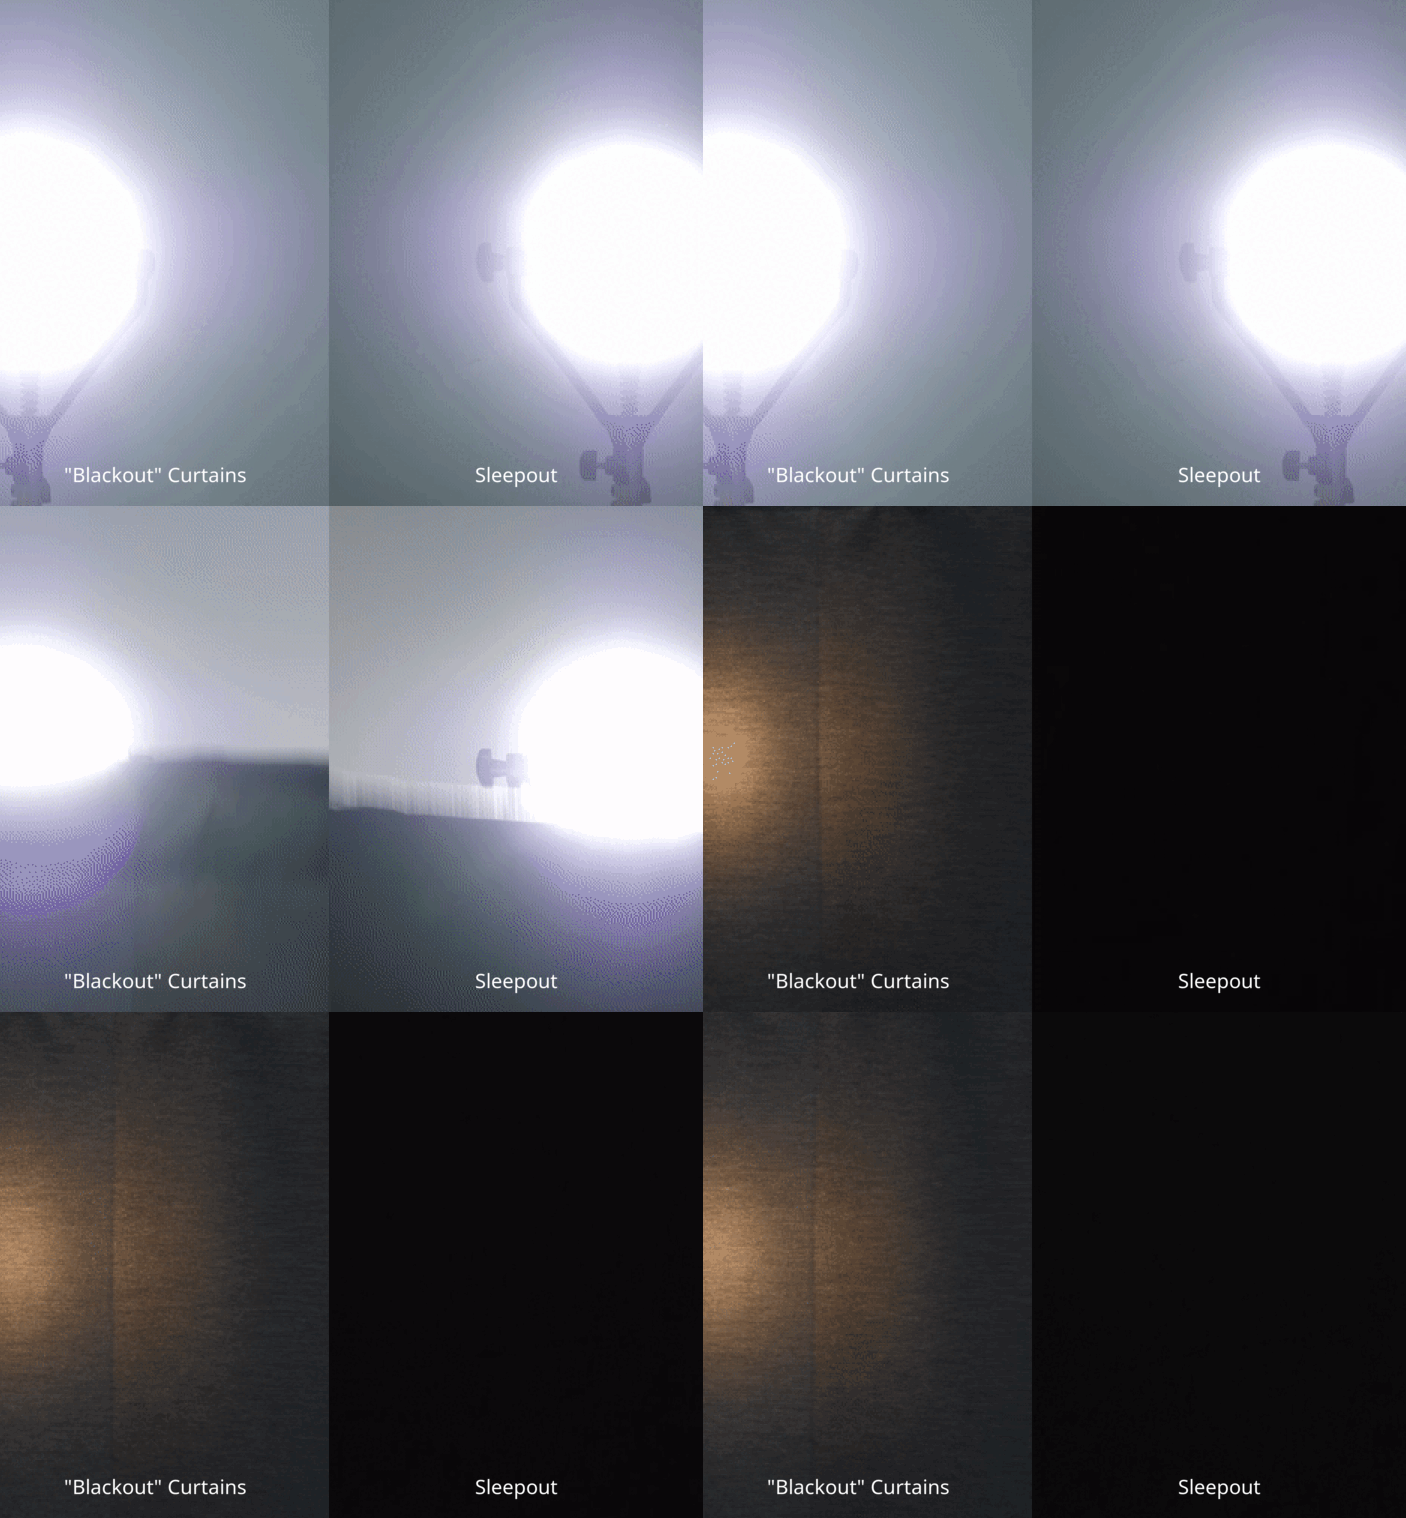
Are you tired of battling sunlight streaming through the gaps in your blackout curtains? Finding a way to seal these gaps can transform your sleep and daily comfort, and that’s exactly what we’re diving into today. This article will guide you, step-by-step, on how to create a seal between blackout curtains, ensuring you achieve the ultimate dark sanctuary. We promise that by the end of this read, you’ll have all the expert tips and tricks to enhance your blackout curtain setup.

The Basics of Blackout Curtains
Blackout curtains are specifically designed to block out light. Their dense fabric not only offers complete darkness but also adds to the room’s insulation, helping to maintain a comfortable temperature. But if you're leaving gaps unsealed, you’re not maximizing their potential. Let’s talk about why the seal matters as much as the curtains themselves.
Why Gaps Happen
Gaps between the edges of blackout curtains and the window frame are common due to various reasons, including incorrect curtain size, installation issues, and curtain rod designs. These gaps allow unwanted light to seep through, undermining the effectiveness of your blackout curtains. Here’s how to tackle them.

Measuring for Perfection
The first step to an impenetrable seal is accurate measurements. Ensure your curtains extend a few inches beyond the window on all sides. This overlap is crucial for effective light blockage. Blackout curtains, like our Sleepout Home Blackout Curtains, offer tailored dimensions to fit various window sizes perfectly.
Installing the Rod Properly
Consider a wrap-around curtain rod which allows curtains to sit snugly against the wall, minimizing gaps at the window’s edges. Placing the rod closer to the ceiling and wider than the window frame ensures the least light penetration.
Layering Curtains
Layering your blackout curtains with another set of thick drapes can enhance the seal. The outer drapes provide additional fabric to cover any potential gaps your blackout curtains might leave exposed.

Using Magnetic Strips
Magnetic strips can be an efficient way to achieve a tight seal. Attach magnetic strips to the curtain edges and the window frame, allowing them to easily snap together and block out any light.
Employ Velcro
Velcro strips offer another secure sealing option. Self-adhesive Velcro strips can be attached to the edges of the curtain and the window frame, ensuring a tight, gap-free seal. Our Sleepout Adhesive Strips are perfect for this purpose, providing a reliable and easy-to-use solution.
Utilizing Suction Cups
Suction cups can help your blackout curtains stick firmly to the window’s surface. Our Extra Sleepout Suction Cups offer an excellent grip and are specially designed to hold blackout curtains in place without leaving any gaps.
Using Tension Rods
Tension rods can be an effective solution for sealing gaps, especially for windows situated within alcoves or recesses. These rods fit snugly within the window frame, pushing the curtains flush against the wall.

Double Rod Approach
Consider installing a double rod system if one is not enough. This setup allows you to add blackout curtains and an additional layer of drapes, maximizing the blackout effect and giving you the flexibility to adjust the amount of light in the room.
Sealing the Top and Bottom
Don’t forget the top and bottom gaps. Use a cornice box to cover the top gap, or a weighted hem at the bottom of the curtain to ensure they hang close to the window sill, preventing light seepage from any direction.
Blackout Curtain Liners
If your current curtains aren’t doing the job, consider adding blackout liners for extra protection. These liners can be easily attached to the back of your existing curtains, providing an additional blackout barrier.

Portable Blackout Curtains
For an adaptable solution, try Sleepout Portable Blackout Curtains. They can be easily installed and removed, making them perfect for frequent travelers or renters who can't install permanent solutions.
Insulation Boosters
Adding a layer of insulation tape around window edges before installing blackout curtains can boost both the blackout properties and the energy efficiency of your home. This tape helps block drafts and light simultaneously.
Sealing Odd-Shaped Windows
For windows with unusual shapes or sizes, custom-fit blackout curtains might be necessary. Tailor your solutions based on your window’s unique configuration to ensure there are no gaps.
Cordless Curtains
Opt for cordless blackout curtains which hang more closely to the wall compared to those with cords and additional mechanisms. They are easier to maintain and secure tightly against the window.
Using Curtain Tiebacks
Properly using curtain tiebacks can also help control light seepage. Ensure to release them fully during nighttime to allow curtains to fall tightly against the window.
Managing Daytime Light
If you're using blackout curtains for sleep during the day, such as for night shift workers, it’s especially essential to ensure no light leaks. Extra layers or a combination of the methods mentioned can be the key.

Trim Excess Fabric
Occasionally, too much fabric can cause curtains to bunch up, creating gaps. Trimming and hemming if necessary can maintain a sleek, tight fit and help enhance the blackout effect.
Regular Maintenance
Regularly check for wear and tear on your blackout setups. Suction cups, adhesive strips, and magnetic seals might need periodic adjustments or replacements to stay effective.
Expert Solutions
If DIY solutions aren’t delivering, don't hesitate to get professional help. Experts can offer custom solutions fitted perfectly to your window and home settings, ensuring complete satisfaction.
In conclusion, sealing gaps between blackout curtains is vital for achieving ultimate darkness and comfort. With accurate measurements, the right tools, and careful installation, you can make a tremendous difference in your living space. This guide has equipped you with everything you need to take your blackout curtain game to new heights. Happy sleeping!

