Are you tired of those pesky beams of sunlight creeping into your room, disrupting your sleep? Creating your own custom blackout curtain fasteners is the perfect solution! In this detailed DIY guide, we will walk you through the steps needed to make those fasteners from scratch. We'll cover everything, from the materials you need to the detailed process. By the end of this article, you'll have the know-how to create your very own blackout curtain fasteners, ensuring a pitch-black room for that perfect night's sleep.
Picture this: You've invested in premium blackout curtains, but there's still light seeping through the sides. This is where custom blackout curtain fasteners come into play. By securing your curtains properly, you can achieve total darkness and enjoy an uninterrupted, restful sleep. Let's dive into the intricate process of creating these fasteners.
Materials Needed
To get started, you'll need a few basic materials:
- Strong fabric (such as canvas or denim)
- Velcro strips
- Heavy-duty sewing thread
- Fabric scissors
- A sewing machine
- Measuring tape
All set? Let's proceed to the first step.
Step 1: Measure Your Windows
Begin by measuring the dimensions of your windows. Be precise. The width and height will determine the length and number of fasteners required. Note these measurements down in your notebook.

Step 2: Cutting the Fabric
Next, cut the fabric into strips. The length should be slightly more than the width of the window for a secure fit, and the width of each strip should be about 2 inches. For a standard window, you will typically need about 4 fasteners – two for the top and two for the bottom.
Step 3: Sewing the Velcro
Using your sewing machine, stitch one side of the Velcro to one end of each fabric strip. Ensure that you sew securely, as the fasteners need to be sturdy. Repeat the process for the other end of the strip with the corresponding side of the Velcro.
Step 4: Attaching to Curtains
With your blackout curtains already hanging, attach the Velcro fasteners you've created by wrapping them around both the curtains and rods, ensuring a snug fit. This will keep the curtains firmly in place, blocking out any remaining light.
Refinements for Aesthetics
For those keen on aesthetics, you may want to choose fabric that matches your curtains or room decor. This extra touch will ensure that the fasteners blend seamlessly into your room’s design.
Additional Tips
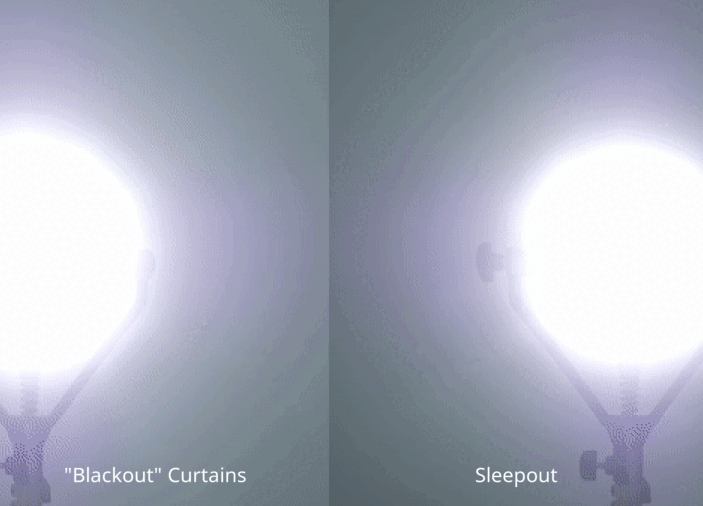
Having trouble with suction cups to hold the curtains securely? Enhance your setup with Extra Sleepout Suction Cups for added stability.

Preset Fasteners for Easy Use
If you're constantly moving and want something more versatile, consider using Sleepout Portable Blackout Curtains. These come with preset fasteners, making it even easier to achieve a dark room wherever you are.
Going the Extra Mile: Embellishing
Want your fasteners to stand out? Embroider them or add beads for a personal touch. Turn a functional object into a piece of art!
Real-Life Examples
One of our readers shared a transforming experience with our DIY fasteners:
"I followed the Sleepout DIY guide and finally got a full night's sleep without any light disturbances. The process was straightforward, and the results were remarkable!" - Jessica S.
Why It Matters
A good night's sleep is crucial for overall health. By taking control of light exposure in your bedroom, you're setting yourself up for better rest and improved well-being.

Final Adjustments
Once all fasteners are in place, step back and check for any gaps. Tweak as necessary for a perfect seal. This ensures maximum light blockage and enhances the efficacy of your curtains.
Conclusion
Congratulations! You now have custom blackout curtain fasteners that will keep your room perfectly dark. With the detailed instructions provided in this guide, you should have no trouble creating these essential additions to your blackout curtains.
Key Takeaways
- Measure your windows accurately for the best fit.
- Use strong fabric and secure Velcro for longevity.
- Customization can be both functional and aesthetic.
- Consider additional accessories like Extra Sleepout Suction Cups for added reinforcement.

With these steps and tips, you now have the knowledge to craft custom fasteners for your blackout curtains. Enjoy the undisturbed sleep in your perfectly darkened room!