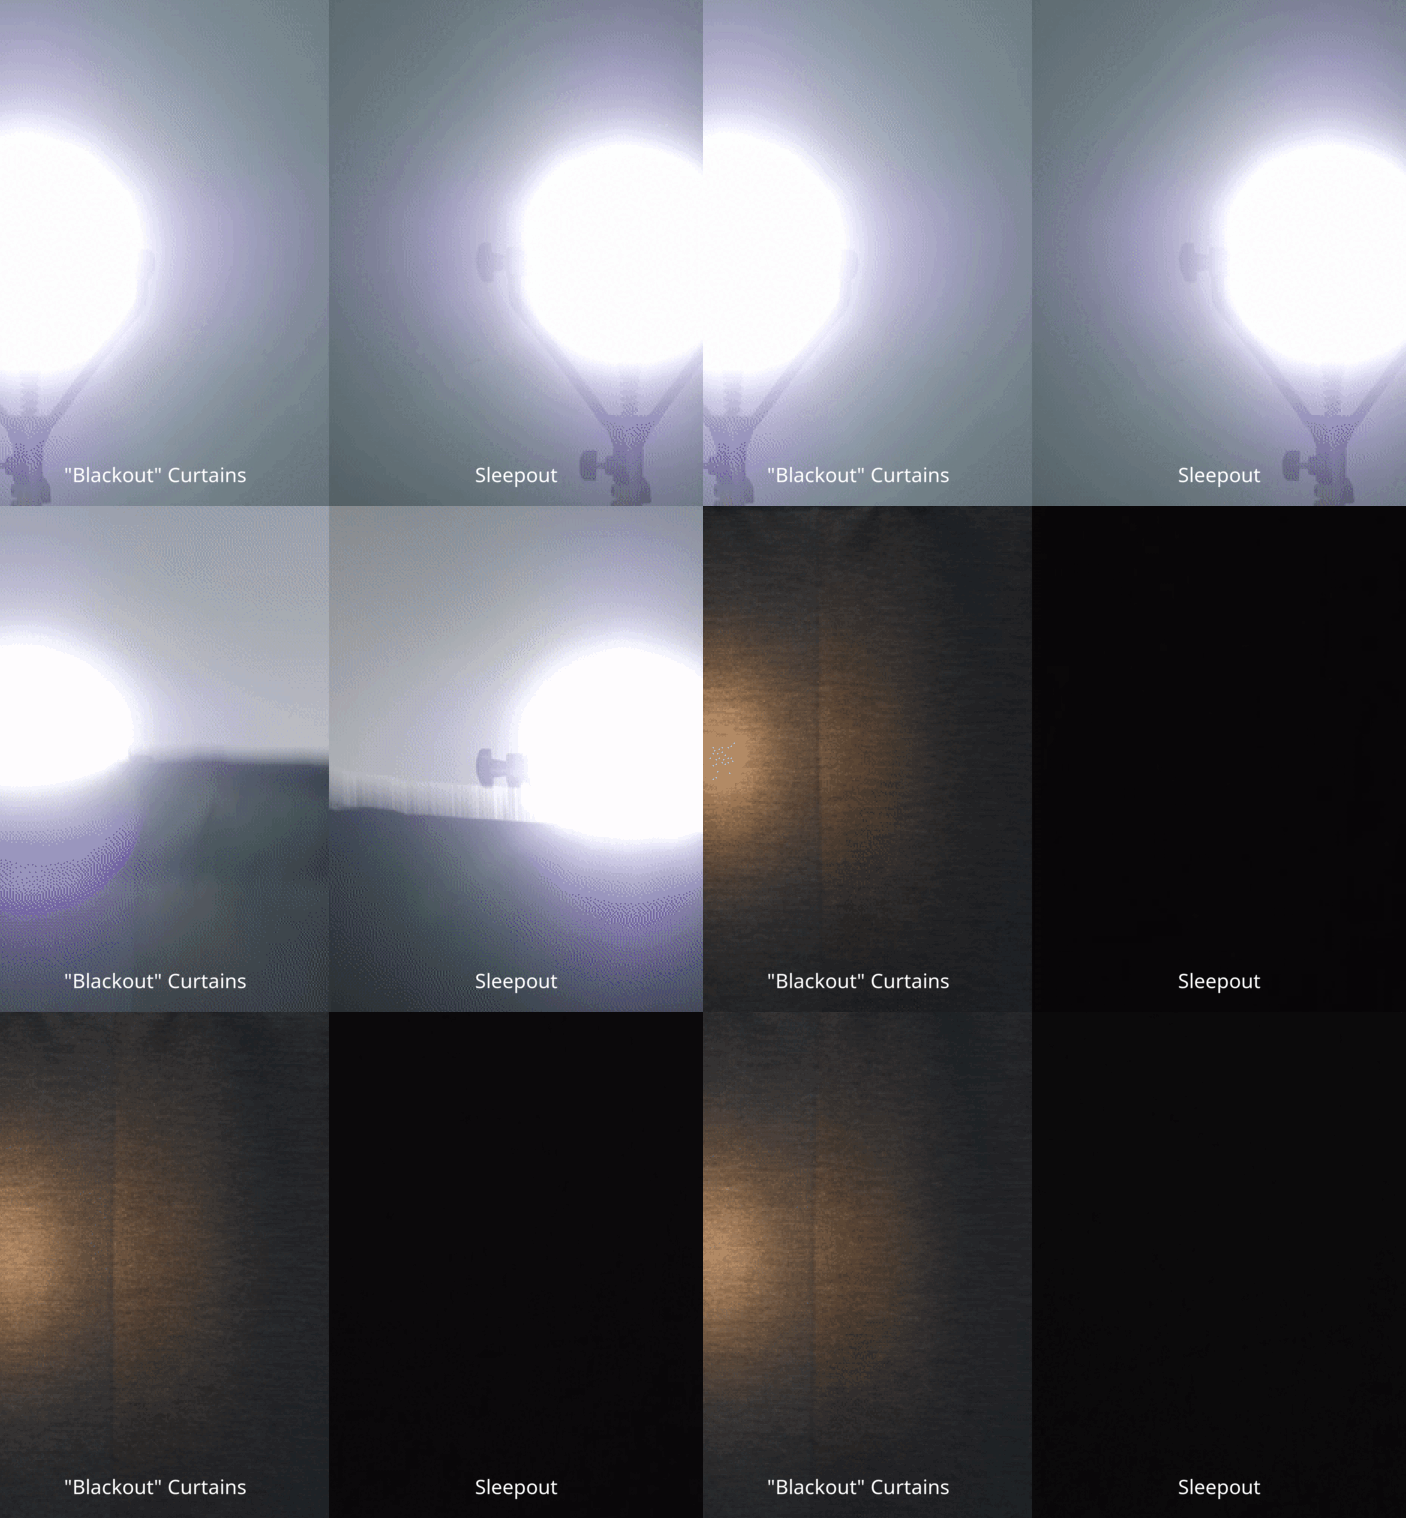
The quest for better sleep can often lead us to explore various options to improve our sleep environment. Among these options, creating a dark, serene atmosphere in your bedroom is paramount. That's where blackout curtains come in, known for their ability to block out light completely. While there are plenty of ready-made options available, such as the highly acclaimed Sleepout Home Blackout Curtains, DIY enthusiasts might prefer to embark on making their own. This guide will walk you through how to make your own blackout curtains to enhance sleep quality, reduce noise, and maintain privacy.
Understanding the Benefits of Blackout Curtains
Blackout curtains are not just about plunging a room into total darkness. They come with a plethora of benefits:
- Better Sleep: The primary benefit of blackout curtains is better sleep. These curtains help create an ideal sleeping environment by minimizing sleep disruptions caused by outdoor lights.
- Energy Savings: Thick blackout curtains provide an extra layer of insulation, keeping your room cooler in summer and warmer in winter. This can lead to significant energy savings over time.
- Noise Reduction: The thick materials used in blackout curtains can also help dampen sound from outside, contributing to a quieter room.
- UV Protection: Sunlight can fade furniture and flooring. Blackout curtains help protect your interiors by blocking harmful UV rays.

Materials Needed
Before you start, gather all necessary materials:
- Fabric of choice (preferably heavy and dark)
- Blackout fabric liner
- Measuring tape
- Scissors or fabric cutter
- Sewing machine or needle and thread
- Curtain rods or tracks (depending on your window frame)
- Metal grommets (optional for a modern look)
- Iron and ironing board
Choosing the Right Fabric
The choice of fabric is critical in making effective DIY blackout curtains. Opt for a dense, opaque fabric that does not let light through. Common choices include velvet, suede, and heavyweight cotton. Remember, the darker the color, the better the light-blocking capabilities.
Step-by-Step Guide to Making Blackout Curtains
Step 1: Measure Your Windows
Accuracy is key in this step. Measure the width and height of your window. For maximum light blockage, add an additional 4-6 inches on each side, top, and bottom of the curtain measurements.
Step 2: Cut the Fabric
Using your measurements, cut both your chosen fabric and the blackout liner. Ensure that both pieces are the same size, which will help in sewing them together neatly.
Step 3: Sew the Fabrics
Lay the decorative fabric on the floor or a large table, right side down. Place the blackout liner on top, with the shiny side facing down. Pin around the edges to hold them together and sew around the perimeter, leaving around a 1-inch seam. Leave one side open for turning the fabric right side out.
Step 4: Iron and Hem
Turn the curtain panel right side out and iron it flat. This helps in giving your curtains a neat finish. Next, fold the open side inward, iron it, and sew to close it completely.
Step 5: Install Grommets (Optional)
If you chose a modern look with grommets, now is the time to add them. Evenly space them along the top of your curtains according to the grommet instructions, usually about 6 inches apart. Then, snap the grommets right into place following their manual.

Step 6: Hang Your Curtains
Slide your new DIY blackout curtains onto a curtain rod and hang them up. Adjust them to ensure they cover any gaps where light might sneak through.
Additional Tips for Enhancing Effectiveness
- If gaps around the curtain still let in light, consider using a wrap-around curtain rod or add velcro along the sides of the curtains and the wall.
- Regularly clean your curtains as accumulated dust can decrease their functionality.
Conclusion
While making your own blackout curtains may seem like a daunting task, it's quite manageable with the right tools and some patience. Remember, a darker room often leads to better sleep, which is crucial for overall health. If DIY isn't for you, don't hesitate to check out Sleepout's ready-made options, which guarantee top-notch quality and effectiveness for a peaceful night's sleep.


