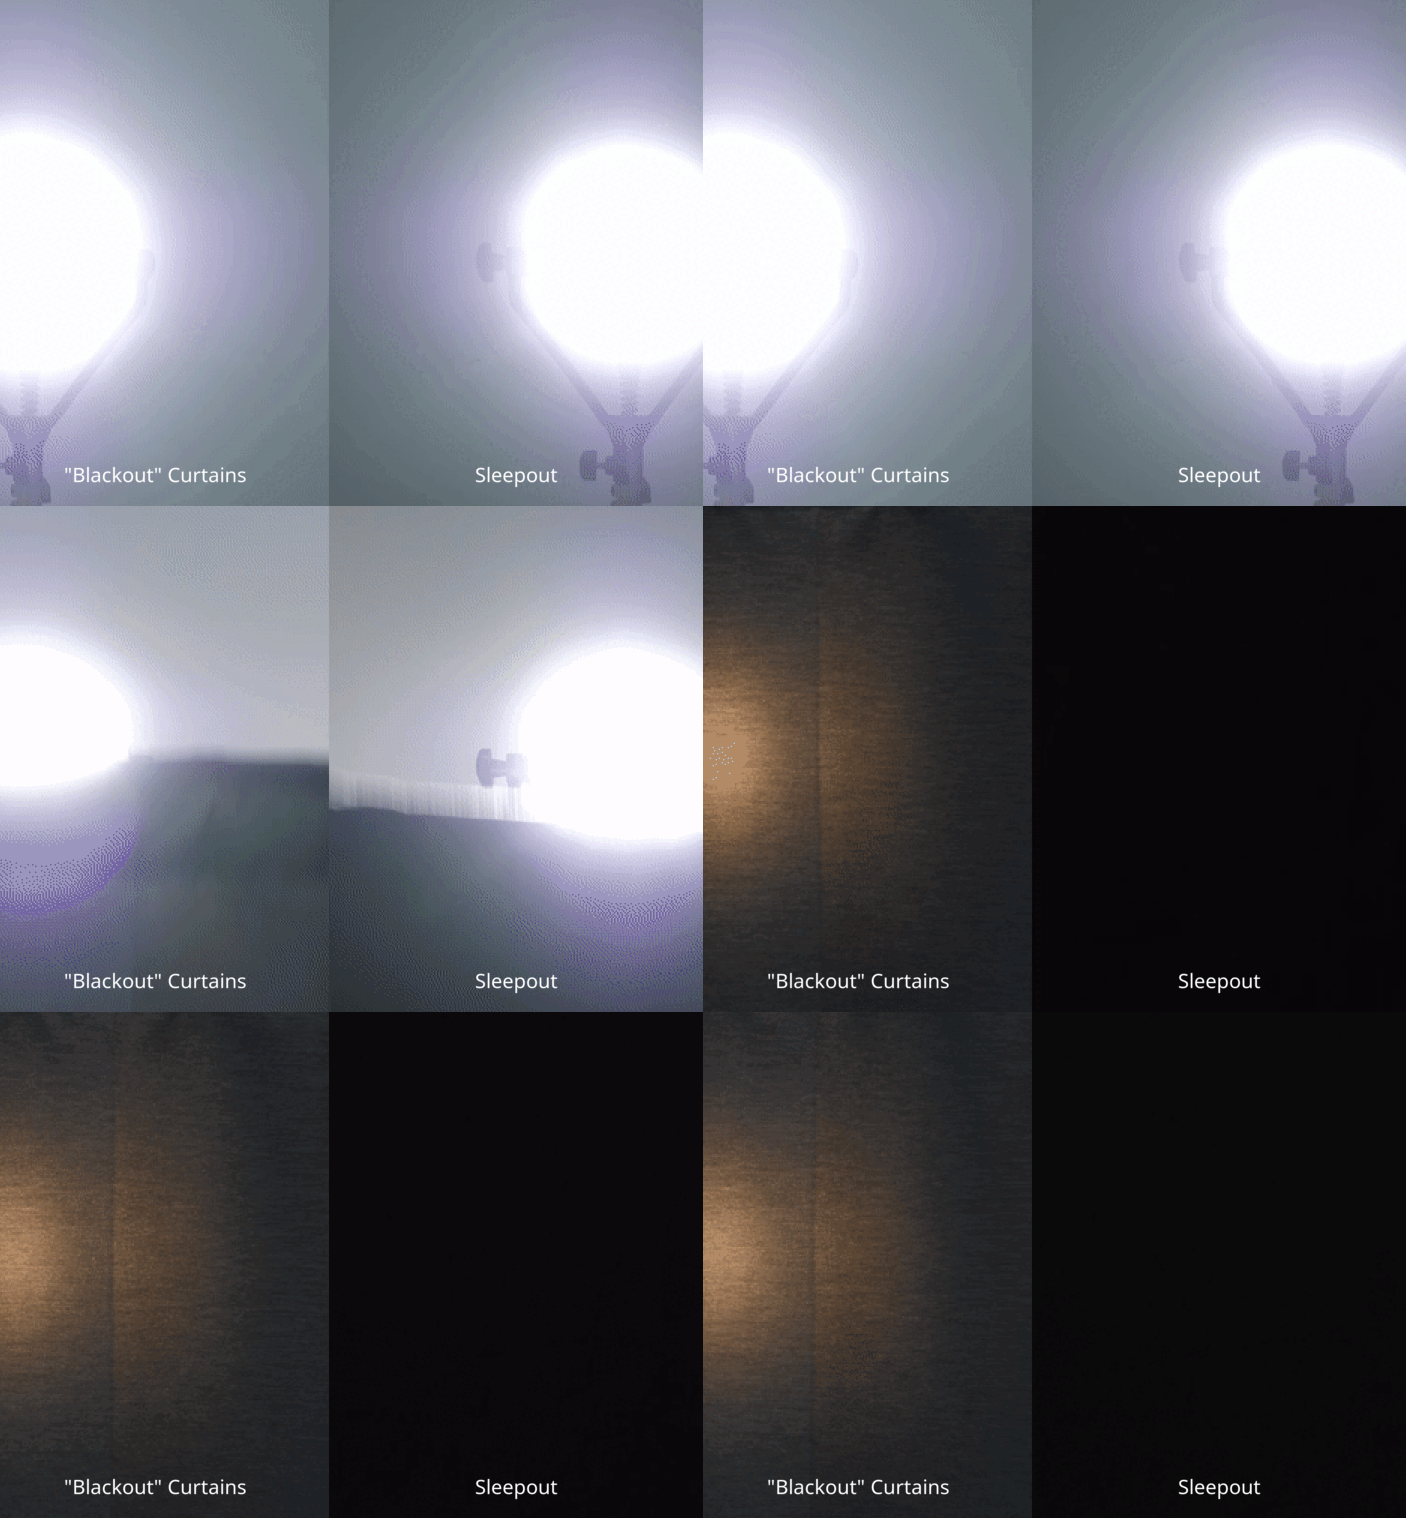
Are you tired of being woken up by early morning sunlight or struggling to keep your room dark for movie nights? Look no further! This complete guide for 2024 will walk you through the process of creating your own DIY blackout curtains. Whether you're a novice or an experienced DIYer, you'll find detailed instructions, tips, and insights to help you make the perfect blackout curtains tailored to your needs. Plus, we're throwing in some expert advice and product recommendations to ensure your DIY project is a success.
Why Blackout Curtains?
Before we dive in, let's talk about why blackout curtains are an essential addition to your home. Not only do they block out unwanted light, but they also help reduce noise and improve insulation, keeping your room warmer in winter and cooler in summer. In the long run, blackout curtains can contribute to better sleep and energy savings.
Materials You Will Need
To start your DIY blackout curtain project, gather the following materials:
- Fabric (preferably thick, heavyweight material)
- Blackout lining
- Thread (matching the color of your fabric)
- Measuring tape
- Sewing machine
- Scissors
- Pins
- Iron
If you're looking for ready-made blackout material, consider the Sleepout Portable Blackout Curtain for a high-quality and easy-to-install option.
Step 1: Measuring Your Window
The first step in making blackout curtains is accurate measurement. Measure the width and height of your window. Add a few extra inches to the dimensions for hems and seams. Typically, you should add 4 inches to the width and 6 inches to the height.
Step 2: Choosing the Right Fabric
The choice of fabric is crucial in determining how effective your blackout curtains will be. Opt for heavy-duty fabrics like velvet, suede, or a specially bought blackout fabric. Ensure the fabric complements your room's decor.

Step 3: Cutting the Fabric
Using your measurements, cut the main fabric and blackout lining. Ensure that the lining is cut slightly smaller than the main fabric to keep the edges neat.
Step 4: Pinning the Fabric
Lay the fabric on a flat surface and pin the blackout lining to the wrong side of the main fabric. This will make sure the light-blocking material is on the inside when you hang the curtain.
Step 5: Sewing the Curtains
Start sewing the pieces together, leaving a 1-inch seam allowance. Sew along the edges, and remember to remove the pins as you go. Reinforce the corners and edges for extra durability.
Step 6: Hemming
Fold the bottom edge of the curtain upward by 2 inches and press it flat with an iron. Then, fold it up again by another 2 inches and sew the hem in place. Repeat this process for the sides and top of the curtain.
Step 7: Adding Curtain Rings or Grommets
Depending on your curtain rod, you might need to add rings or grommets. Mark the positions for the rings or grommets along the top edge of the curtain and follow the manufacturer's instructions for attachment.

Step 8: Ironing and Final Touches
Iron your curtains to remove any wrinkles and give them a polished look. Ensure that all hems and seams are flat and neat.
Installing Your Blackout Curtains
Finally, hang your curtains on the rod and enjoy your dark, cozy room. Blackout curtains are perfect for bedrooms, playrooms, nurseries, and even living rooms where you want to block out light and create a peaceful ambiance.
DIY vs. Ready-Made Blackout Curtains
While DIY blackout curtains can be rewarding, they do require time and effort. If you prefer a quick and hassle-free solution, consider the Sleepout Home Blackout Curtains. They offer high-quality, stylish blackout curtains that can transform any room instantly.

Expert Tips
"Blackout curtains are a game-changer for anyone who struggles with sleeping in a bright room. The thicker the fabric, the better the blackout effect." – Jane, Interior Designer
Incorporating Style
Don’t think that blackout curtains have to be purely functional. With the right fabric, colors, and patterns, they can also be a stylish addition to your interior décor.
Additional Benefits
Besides improving sleep and ambiance, blackout curtains can also protect your furniture and artwork from sun damage and reduce your heating and cooling costs throughout the year.
Caring for Your Blackout Curtains
To keep your blackout curtains in top condition, follow the care instructions for the fabric. Most can be cleaned with a simple vacuuming or a gentle machine wash.

Testimonials
"We made our own blackout curtains using this guide, and it's made a world of difference. Our baby's room is now completely dark, and she sleeps so much better." – Laura, Mother

Conclusion and Key Takeaways
Creating your own blackout curtains can be a fulfilling project that offers numerous benefits, from better sleep to energy savings. With this comprehensive guide, you now have all the information you need to make effective, stylish blackout curtains that suit your home. Remember, whether you opt for a DIY approach or choose ready-made options like the Sleepout Portable Blackout Curtain or the Sleepout Home Blackout Curtains, the main goal is to achieve that perfect dark and restful environment.
Enjoy your new blackout curtains and the improved comfort they bring to your home!

