For parents, ensuring that their children have a restful and uninterrupted sleep is paramount. Quality sleep is essential for a child’s development and overall health. One way to significantly improve your child’s sleep environment is by installing blackout curtains. These curtains block out external light, creating a dark and cozy sleeping environment. In this article, we focus on kids’ blackout curtains with grommets and provide an easy installation guide to help you set them up efficiently.

Why Choose Blackout Curtains for Your Kids' Room?
Blackout curtains offer numerous benefits for a child’s room. They are designed to block out up to 99% of external light, ensuring your child’s sleep is not disrupted by sunlight, street lights, or car headlights. Blackout curtains also provide additional insulation, helping to maintain a comfortable room temperature. This can be especially beneficial in creating an environment conducive to sleep during hot summers or cold winters.
Why Grommets?
Grommet-top curtains come with metal rings (grommets) at the top, through which you slide the curtain rod. This design allows for smooth opening and closing of the curtains while making them easy to install and remove. Grommets also add a contemporary look to your child’s room, ensuring functionality meets style.
Step-by-Step Guide to Installing Kids' Blackout Curtains with Grommets
Step 1: Measure Your Window
Before purchasing your blackout curtains, it's essential to measure your window's width and height accurately. This will ensure that the curtains you buy will adequately cover the window and block out maximum light.
Step 2: Choose the Right Curtains
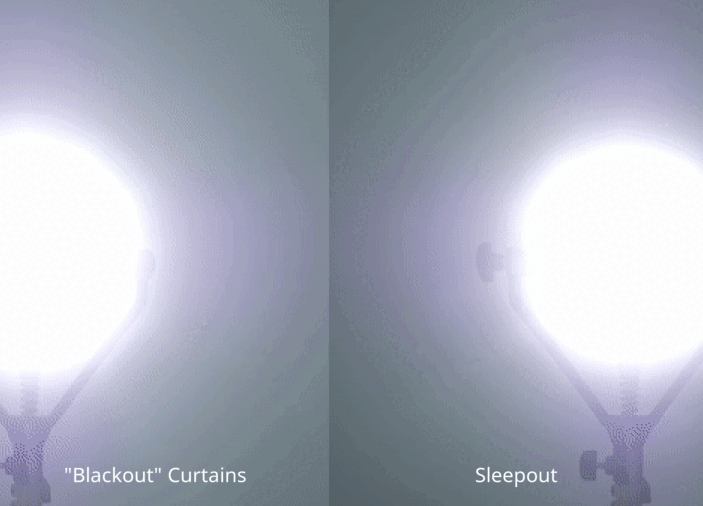
When selecting curtains, it's crucial to choose the appropriate size based on your measurements. Consider the fabric color and design that would complement your child's room decor. If you are looking for versatile and easy-to-install options, consider Sleepout Portable Blackout Curtain which fits snugly into the window frame without needing a rod.
Step 3: Gather Your Tools
You will need a curtain rod, brackets, screws, a screwdriver, and a measuring tape. Ensure you have all the necessary tools before you start the installation process.
Step 4: Install the Brackets
Using your measuring tape, mark the spots on the wall where you will install the brackets. Ensure the brackets are level and evenly spaced. Drill holes at the marked spots and secure the brackets with screws.
Step 5: Attach the Curtain Rod
Thread your grommet-top blackout curtains onto the curtain rod. Once threaded, carefully place the curtain rod onto the brackets. Ensure the rod is securely seated in the brackets.
Step 6: Adjust and Style
After hanging the curtains, adjust them to ensure they hang evenly. Smooth out any wrinkles or folds for a neat appearance. You may also want to tie back the curtains during the day to let in natural light and allow your child to enjoy a brighter room when not sleeping.

Tips for Maintaining Your Blackout Curtains
Regular Cleaning
To prolong the life of your blackout curtains, regular cleaning is essential. Refer to the care instructions provided by the manufacturer. Generally, vacuuming the curtains with a soft brush attachment or gently wiping them with a damp cloth can be effective ways to maintain their cleanliness.
Avoid Exposure to Direct Sunlight
While blackout curtains are designed to block sunlight, prolonged exposure to direct sunlight can cause the fabric to fade over time. To prevent this, consider rotating your curtains periodically or installing a sheer layer underneath.
Inspect Grommets and Rods
Regularly check the grommets and curtain rod for any signs of wear or damage. If you notice any issues, address them promptly to avoid further damage to your curtains or rod.

Conclusion
Installing kids’ blackout curtains with grommets is a straightforward process that can greatly enhance the quality of your child’s sleep. By following the step-by-step guide provided, you can easily set up these curtains and create a dark, cozy, and comfortable sleeping environment. Remember, investing in quality sleep solutions like blackout curtains is an investment in your child's well-being and development. Sweet dreams!