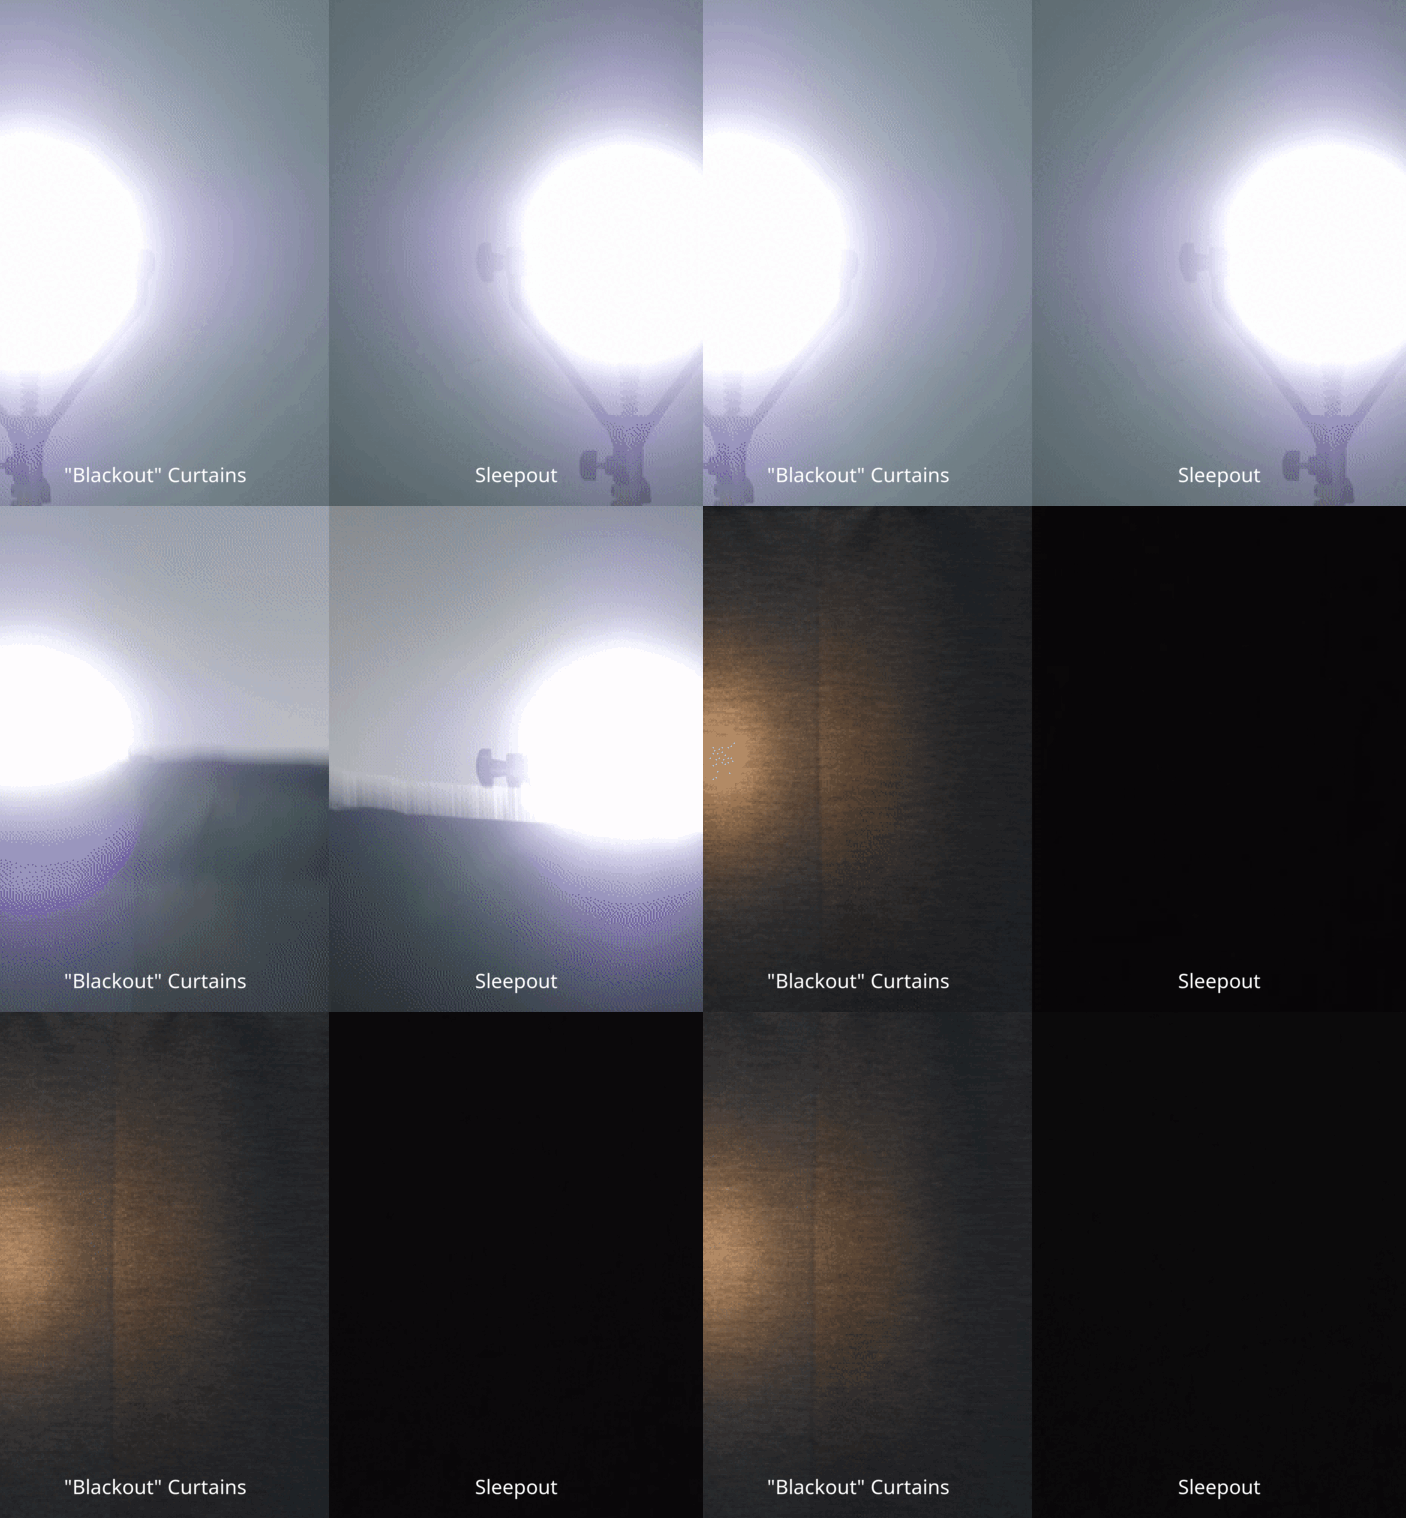
Blackout curtains are essential for those who seek a dark and peaceful environment in their homes, whether for improved sleep or enhanced privacy. In today's fast-paced world, the ability to create a serene and relaxing atmosphere within one's living space is invaluable. Therefore, we provide a thorough and easy-to-follow guide to installing various blackout curtains to cater to your individual needs and preferences.
How to Hang Portable Blackout Curtains
For those who desire a straightforward and convenient method for installing blackout curtains in their homes, portable blackout curtains, such as the Sleepout Portable, are the ideal solution. These innovative curtains employ high-strength suction cups for hassle-free installation, eliminating the need for complex hardware or tools. As an added bonus, portable blackout curtains can be easily repositioned within your home or taken with you when traveling, providing a versatile and adaptable option for maintaining privacy and darkness wherever you go.
- Measure your windows: Utilize a measuring tape to find the width and height of every window you wish to cover with blackout curtains. Take note of any obstructions, such as window sills or handles, that may impact the curtain placement. Jot down these measurements, as they will be crucial in selecting the right size curtains for your windows.
- Select appropriate curtains: When choosing portable blackout curtains with suction cups, ensure their durability and effectiveness in staying put (Sleepout suction cups have a locking system to prevent them from falling once hung). Additionally, consider the curtains' material, color, and style to ensure they complement your room's décor and meet your preferences.
- Prepare the windows: Before hanging the curtains, first clean the windows with glass cleaner to remove any dirt, dust, or residue that may affect the suction cups' grip. Allow the windows to dry thoroughly to ensure optimal adhesion of the suction cups.
- Set up the curtains: Remove the suction cups from their packaging and attach them to the window according to the manufacturer's instructions. Make sure the suction cups are firmly secured and properly aligned before proceeding. Then, place the curtains on the suction cups, ensuring they are evenly distributed and hang correctly. Arrange the suction cups to hang the Sleepout Portables horizontally or vertically, based on the room's requirements and your aesthetic preferences.
How to Hang Blackout Curtains With a Rod
For individuals seeking a classic and elegant approach to installing blackout curtains in their homes, standard blackout curtains with a rod are the perfect choice. These timeless curtains utilize a traditional rod system for a secure and stable installation, ensuring your curtains remain firmly in place. While they may require some basic tools and hardware, the process of hanging standard blackout curtains with a rod is relatively simple and straightforward. Moreover, these curtains offer a wide range of design and style options, allowing you to select the perfect curtains to complement your home's decor. With standard blackout curtains and a rod, you can create a sophisticated and polished atmosphere in your living space while effectively maintaining privacy and darkness.
Before starting, ensure you have the following equipment and materials ready:
- Measuring tape
- Pencil
- Screwdriver
- Curtain rod(s)
- Blackout curtains
- Screws or adhesive strips
While setting up a curtain rod in an apartment, consider these tips to ensure a secure and accurate installation:
- Measure with precision: Before beginning, accurately measure the window width and the distance from the ceiling to the desired curtain rod placement. Taking these measurements will help you choose the appropriate curtain rod size and ensure the installation height is correct, providing optimal coverage and aesthetic appeal.
- Utilize a stud finder: Given that most apartments have hollow walls, screws alone may not provide sufficient support for the curtains' weight. To securely install the curtain rod, use a stud finder to locate wooden studs within the wall and attach the rod using screws. This method guarantees a more robust and stable installation.
- Opt for mounting brackets: In cases where the curtains' weight may be too much for the screws to bear, even when attached to wooden studs, it's advisable to use mounting brackets for added support and stability. These brackets ensure that the curtain rod remains firmly in place, preventing any potential sagging or damage to the wall.
- Consider adhesive strips: If you're uneasy about using a drill or if your apartment prohibits drilling, adhesive strips can be employed as an alternative to mount the curtain rod. Be sure to use robust adhesive strips that can support the curtains' weight. However, keep in mind that curtains may not be as securely attached as they would be with screws, and may require occasional repositioning.
- Hang the curtains with care: Once the curtain rods are securely in place, it's time to hang the curtains. Begin by drawing the curtains open and positioning them on the rod. Then, carefully adjust the curtains to ensure even spacing and a straight, visually appealing hang. Properly hung curtains not only provide effective light-blocking but also contribute to the overall aesthetic of your living space.
Hanging blackout curtains, whether portable or with a rod, can significantly improve the comfort and privacy of your living space. By following the detailed step-by-step instructions provided in this guide, you can effortlessly install blackout curtains in your apartment, catering to your specific needs and preferences. Remember to measure carefully, select the right curtains, and consider your apartment's restrictions when installing. With these tips in mind, you'll be well on your way to enjoying a more restful and cozy environment in no time.


