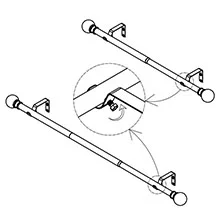
The Sleepout Curtain Rod adjusts from 40 to 80 inches to fit a range of window widths. You may make the rod longer by ordering more rods and use the brackets to support it in the middle.
Before you install
-
For the best look and coverage, position the rod as high and wide as possible around the window.
-
The rod does not include end caps or finials. They are not required, but standard-size options can be purchased elsewhere in many styles.
Install the Sleepout Curtain Rod
-
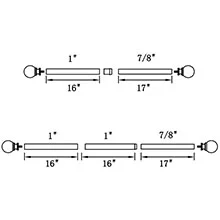
Assemble the rod. Connect the threaded rod sections. If a connection is not smooth, check the alignment and reconnect it. Use the sections with head mounts—the small holes near the ends—as the two end pieces.
-
Set the rod length. Hold the assembled rod over the window and choose the width. Go as high and wide as possible for better coverage.
-
Add the curtains. Slide the curtains onto the rod. Hold the loaded rod over the window to visualize the bracket positions.
-
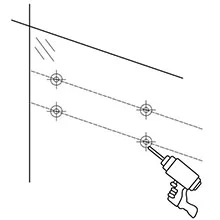
Mark the first bracket. Mark one bracket hole with a pencil. Either drive the screw directly into the wall or drill a pilot hole approximately the size of the screw.
-
Center the rod. Measure from the first bracket hole to the center of the window. Use the same distance from the center to mark the opposite bracket hole.
-
Level the brackets. Check the two marks with a level or by eye and adjust as needed.
-
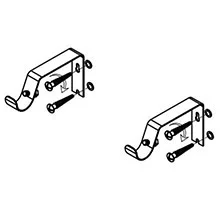
Install the brackets. Disassemble the brackets to make them easier to screw in. Install the top screw for each bracket. Once both are level, drill and install each lower screw.
-
Adjust the brackets. Reassemble them on the wall and set their distance from the wall. Loosen each thumbscrew—the small screw on the side—by hand.
-
Hang the rod. Place the rod in the brackets. If it is difficult to reach, lift one side at a time while resting the other end gently on the floor.
-
Secure the rod. Tighten both thumbscrews by hand.